|
Installation
guide
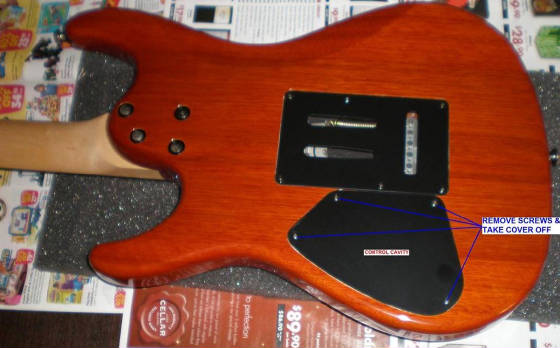
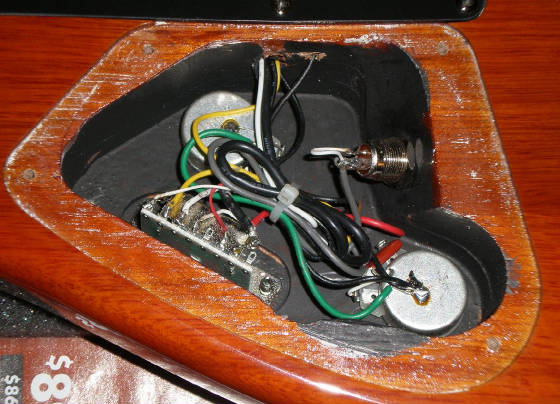
STEP ONE Locate your control cavity & get familiar with it If you have a scratch plate like on a fender Stratocaster you will have to remove the entire scratch plate on the
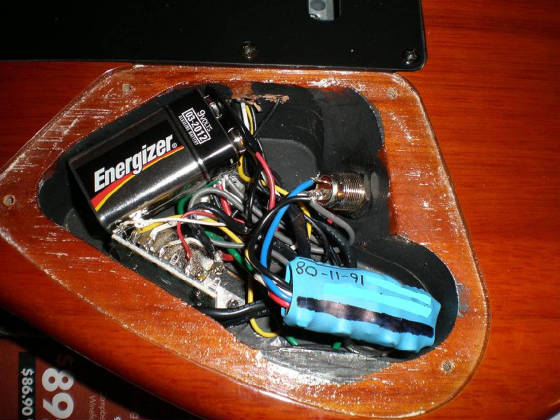
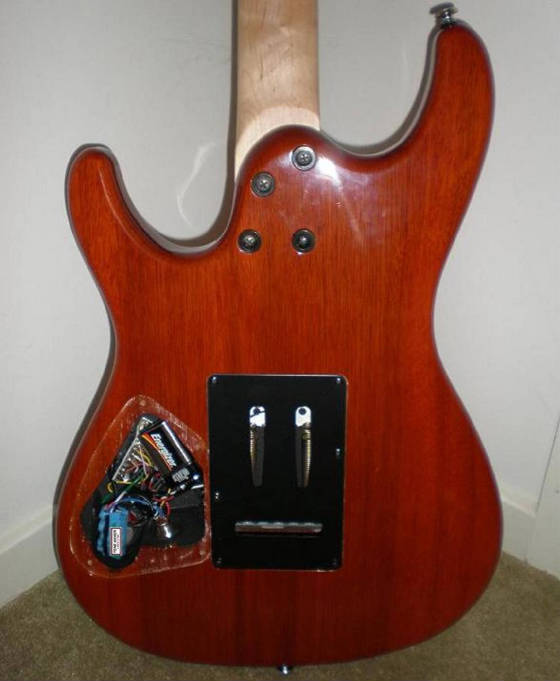
front of the guitar If you have pickups mounded
to the body remove the control cavity (should be located on the back of the guitar) Find a suitable location for the Tone Kicker & nine volt battery
STEP TWO Locate the output jack If you have
a stereo output jack in your guitar then you can use it for tone kicker If you have a mono output jack then replace it with a stereo output jack (You will have to supply your own output jack!) NOTE: there are basically two types of stereo ¼ output jacks.
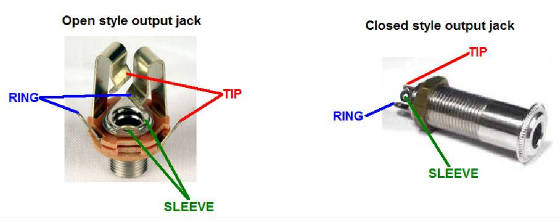
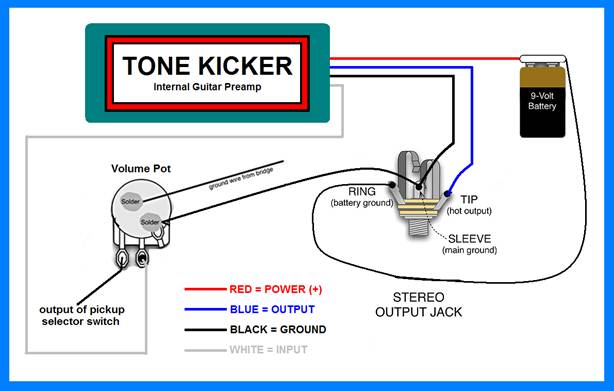
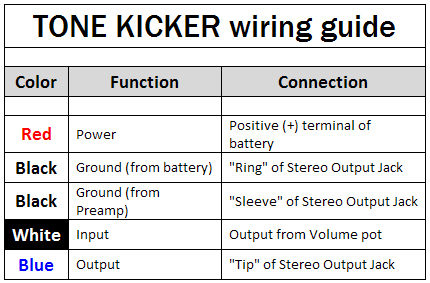
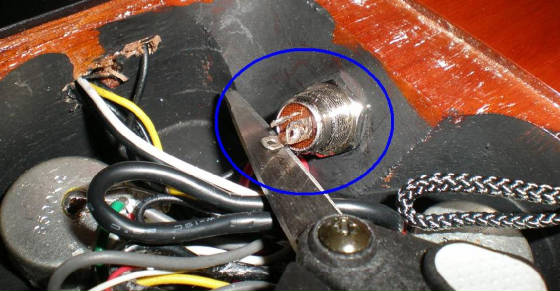
There will be three terminals; they are referred to as TIP, RING & SLEEVE TIP = output signal from your guitar RING = Switch for Ground SLEEVE = Ground NOTE: Closed style output jack terminals vary from different brands; please ensure you know what the correct terminals
are by running a continuity test. The guitar below has a closed style output jack;
Make a note of what wire's on the output jack are connected to & which terminal's they are
attached to. In this guitar there is a shielded wire used for the output wire, the white wire is inside the grey wire which
is the ground (shield). The white wire is the output signal from the guitars circuit normally this wire comes from the center
lug of the volume potentiometer. It is then connected to the "TIP" of the output jack & the grey ground shield comes from
a common ground point (usually from the back of the volume potentiometer) and connects to the "SLEEVE" of the output jack.
Please note your wires in your guitar may be different colors but they serve the same purpose. Your wires may not use the
shielded kind like in the picture above, if your guitar does not use shield wires just use the ground & signal wires as
they are, you do not need shielded wire. STEP THREE Remove the wires
from the output jack making note of which wires are connected to what terminals on the output jack.
STEP FOUR Start by connecting the Black wire of the battery snap to the "RING" terminal of the output jack.
STEP FIVE Connect the input, output & ground wires of the tone kicker Black Wire from the tone kicker is connected to the "SLEEVE" terminal
of the output jack along with the original wire that was connected to the " SLEEVE " terminal of the output jack, or you can
connect the Black Wire from the tone kicker to any common ground point in the guitar's circuit like the back of the volume
or tone potentiometers (but NOT the "RING" terminal of the output jack). Please note that the original wire that was connected
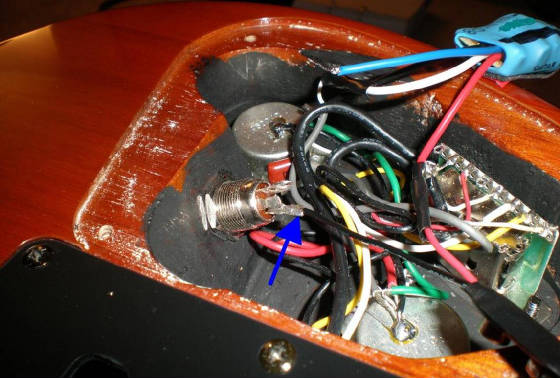
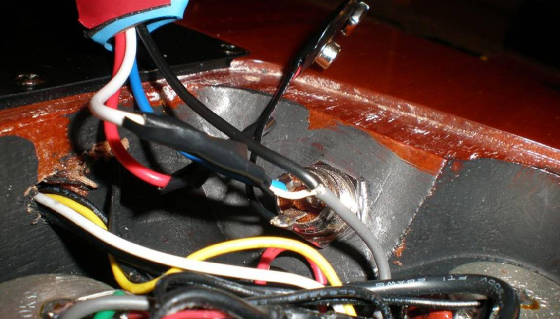
to the output jacks "SLEEVE " terminal must still be connected to it. In the picture below the black wire from the tone kicker
was first soldered to the original grey wire that went to the "SLEEVE " terminal, then both wires are soldered to the " SLEEVE
" terminal of the output jack White Wire the input (White wire) from the tone kicker connects to the output of the guitar circuit (this is usually the centre
lug of the volume pot). Blue wire is the output of the tone kicker and is connected to the "TIP" terminal of the output jack.
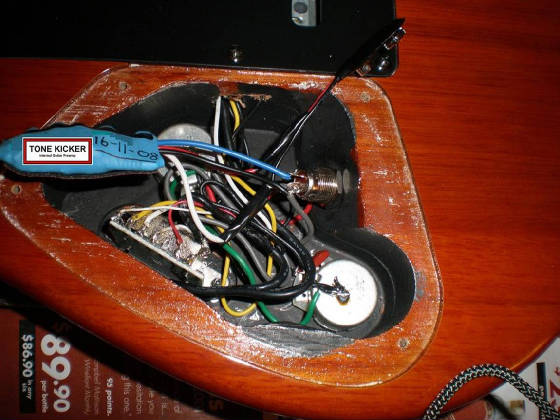
CLOSE UP OF
WIRING CONNECTIONS
FINAL NOTES; 1. Insulating
the battery You can use a small piece of cloth to wrap around
the battery, or a better method is to wrap the battery in electrical tape. (note: you will have to supply your own battery). The reason for this is to ensure that the metal casing of the battery does not "short out" any part of the guitars
circuit
2. Using heat shrink or electrical tape;
If you need to join any
wires to install the Tone Kicker you will have to make sure each join is insulated. You can use small pieces of "Heat Shrink"
or wrap each wire join with electrical tape.With every wire join if possible start by; -Slipping the heat shrink over one of the wires (if you choose to use heat shrink) -Making a Mechanical connection -Solder the wires together neatly -Slide the heat shrink over the connection & apply heat to shrink, or wrap the join with
electrical tape (IF YOU DO NOT INSULATE
YOU'RE JOINS THE CIRCUIT COULD "SHORT OUT" AND THE TONE KICKER WILL NOT FUNCTION LEAVING YOUR GUTIAR WITH NO OUTPUT)
|